


JHipster是一个全栈开发工具,可以通过简单的命令帮你生成前端代码(Angular/React)和后端代码(Spring Boot)以及API服务器。
开始之前,请按照Windows环境下安装JHipster这篇文章安装JHipster。
一、生成后台应用
1.输入命令
PS E:\dserver> jhipster --skip-client                                                                                   INFO! Using JHipster version installed globally
INFO! Executing jhipster:app
2.接下来需要进行一系列选择,比如我的。
Welcome to JHipster v6.10.1
Application files will be generated in folder: E:\dserver
 _______________________________________________________________________________________________________________

  Documentation for creating an application is at https://www.jhipster.tech/creating-an-app/
  If you find JHipster useful, consider sponsoring the project at https://opencollective.com/generator-jhipster
 _______________________________________________________________________________________________________________

? Which *type* of application would you like to create? Monolithic application (recommended for simple projects)
? [Beta] Do you want to make it reactive with Spring WebFlux? No
? What is the base name of your application? dserver
? What is your default Java package name? com.aitlp.dserver
? Do you want to use the JHipster Registry to configure, monitor and scale your application? Yes
? Which *type* of database would you like to use? SQL (H2, MySQL, MariaDB, PostgreSQL, Oracle, MSSQL)
? Which *production* database would you like to use? Microsoft SQL Server
? Which *development* database would you like to use? Microsoft SQL Server
? Do you want to use the Spring cache abstraction? (Use arrow keys)
> Yes, with the Ehcache implementation (local cache, for a single node)
? Do you want to use the Spring cache abstraction? Yes, with the Redis implementation
? Do you want to use Hibernate 2nd level cache? Yes
? Would you like to use Maven or Gradle for building the backend? Gradle
? Which other technologies would you like to use?
? Would you like to enable internationalization support? Yes
? Please choose the native language of the application English
? Please choose additional languages to install Chinese (Simplified)
? Besides JUnit and Jest, which testing frameworks would you like to use?
? Would you like to install other generators from the JHipster Marketplace? No

Installing languages: en, zh-cn for server
Git repository initialized.
3.等待片刻,最后会出现如下提示,表示生成完成。
Server application generated successfully.

Run your Spring Boot application:
./gradlew (gradlew if using Windows Command Prompt)
INFO! Congratulations, JHipster execution is complete!
注意,在使用gradle运行项目之前,由于我前面的生成代码的选项里选择了数据库SQL Server和redis缓存,因此这两项必须到配置文件里修改以下,改成你的服务地址。
二、生成前台应用
1.输入命令
PS E:\jhipster-learning\dclient> jhipster --skip-server --auth jwt --db sql
INFO! Using JHipster version installed globally
INFO! Executing jhipster:app
2.接下来需要进行一系列选择,比如我的。
Welcome to JHipster v6.10.1
Application files will be generated in folder: E:\jhipster-learning\dclient
 _______________________________________________________________________________________________________________

  Documentation for creating an application is at https://www.jhipster.tech/creating-an-app/
  If you find JHipster useful, consider sponsoring the project at https://opencollective.com/generator-jhipster
 _______________________________________________________________________________________________________________

? [Beta] Do you want to make it reactive with Spring WebFlux? No
? What is the base name of your application? dclient
? Which *Framework* would you like to use for the client? React
? Would you like to use a Bootswatch theme (https://bootswatch.com/)? Default JHipster
? Would you like to enable internationalization support? Yes
? Please choose the native language of the application English
? Please choose additional languages to install Chinese (Simplified)
? Besides JUnit and Jest, which testing frameworks would you like to use?
? Would you like to install other generators from the JHipster Marketplace? No

Installing languages: en, zh-cn for client
Git repository initialized.
3.等待片刻,最后会出现如下提示,表示生成完成。
Client application generated successfully.

Start your Webpack development server with:
 npm start


> dclient@0.0.1-SNAPSHOT cleanup E:\jhipster-learning\dclient
> rimraf build/resources/main/static/

INFO! Congratulations, JHipster execution is complete!
三、分别运行前后端代码
前台:
npm start
后台:
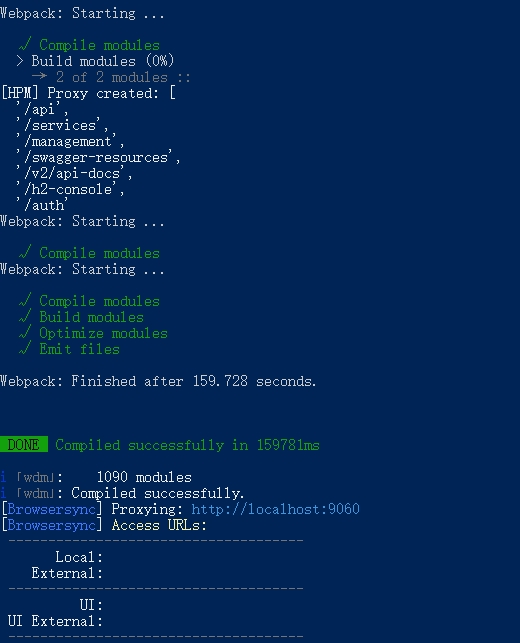
./gradlew

访问管理控制台:http://localhost:9060/。

最新评论
大哥 求求
一个人用就够,多人钱包伤不起啊
没有央视频道,这怎么玩?
1.6.8很多频道,但80%都是失效的